Fix a hacked website and prevent it from happening again
![]() February 4, 2019 ▪
February 4, 2019 ▪ ![]() Web 101
Web 101
A client emailed me because her browser had notified her that her blog had been marked as suspicious by Google and she didn’t know how or why that had happened. Further checking revealed that google had found malicious software being downloaded and installed without user consent. Her WordPress site had been hacked and the hacker had added malicious code to her templates. My client had no clue how to fix a hacked website. Luckily, she had me to ask, but not everyone has a trusted designer or tech support that they can email with these problems.
So to help others, I’m writing a list of the steps I take to fix a hacked website. Some of these steps are a bit advanced. You’ll need to know how to use FTP or the File Manager in your host’s cPanel. If that’s a bit too confusing for you Swank is always available to help!
CHANGE YOUR PASSWORDS
First things first, change your passwords FOR EVERYTHING. You’ll absolutely want to change your blog password and your FTP/control panel passwords (if they aren’t the same). But if you use the same or similar password for your email or anywhere else, you are going to want to change them as well. Even if you’ve never been hacked, it’s good practice to change your passwords regularly, at the very least yearly.
In my client’s case, the hacker was able to guess her password, which was a very simple name. DON’T DO THIS! Make your passwords as secure as possible and try not to use the same password for everything:
- Use a combination of letters and numbers as well as lowercase and uppercase and possibly even some symbols
- Try not to use recognizable names or dates/numbers
- 8-10 characters is a good length (though the longer the better)
Here’s a password trick I learned a while back that has been invaluable to me. It’s a way to make every password for every site you visit different, but also something that you can remember. First think of a good base using the rules I mentioned above, like: Xd5ye8*K
It may be hard to remember at first, but you are going to be typing it over and over so you should have no problem memorizing it eventually. Next, you’re going to add an identifier of the site your password is for, so you need to come up with a system. Examples of this could be the first four letters of the site name or the first two and last two. It doesn’t really matter how you want to do it, just come up with a rule that can be applied to all sites. Once you’ve done that add the letters to front or back of the base password you already came up with.
So for twitter, you password would be: twitXd5ye8*K. For gmail it would be gmaiXd5ye8*K. For facebook, faceXd5ye8*K, and so on.
DELETE/CHANGE YOUR USERS’ PASSWORDS
The hacker could have registered themselves as a user on you blog so that they could get in again. Or they could have changed the password for one of your users so they could log in under that username. Click on Users in your WP admin and look over the list of registered users. If you have too many users and don’t want to have to change them all, you might consider deleting them all (except for yourself, of course). People can always re-register.
Look for users with suspicious or spammy looking emails and delete them. Many of my blogs have been getting a lot of registration spam lately. Delete these users immediately, specifically if any of the users have an email address like xzy@mail.ru or anything else that looks random or generic.
If you don’t have a lot of users, then if may just be better in the long run to turn that option off altogether. Go to Settings and under Membership, un-check the box next to “Anyone can register”.
INSTALL A SECURITY PLUGIN
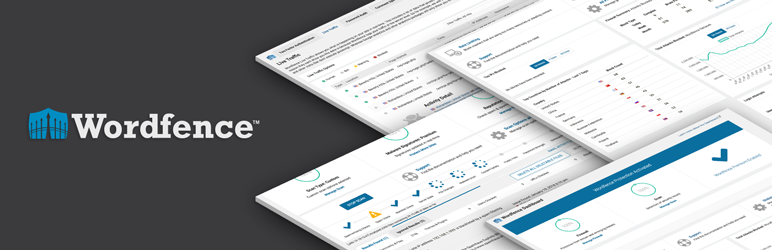
The one I use myself and install on my client’s sites is Wordfence Security. It’s the most popular security plugin because it’s a very good all-in-one security plugin with file scanning and a firewall.
To install, go to Plugins>Add New and search for Wordfence. Click the Install button and then click Activate.
Once installed, go to Wordfence>Dashboard. You will probably get a pop-up asking you to fill in your email address. You will want to do this so you get notified of any issues. At the top of the page you’ll see a notice like this: “To make your site as secure as possible, take a moment to optimize the Wordfence Web Application Firewall.” Click to start the configuration. It will ask you download a backup of your .htaccess, then click on Continue to finish up.
Next, you’ll want to go to Wordfence>All Options. Click on General Wordfence Options and make sure the Auto-update feature is checked. Also check “Hide WordPress Version.”
Next click on Email Alert Preferences. The only ones I generally keep checked are “Alert me with scan results for issues of this severity level: Critical” and “Alert me when there’s a large increase in attacks detected on my site.” The rest I find are unnecessary since Wordfence will be doing its job and you don’t need to be notified of every little thing.
Don’t forget to click the Save Changes button at the top of save your settings.
SEARCH YOUR THEME FILES
Next you’ll need to find whatever the hacker added and take it out. The first place to look, especially if you are a WordPress user, is your template. In your WP admin, click on Appearance and then Editor. A list of all your theme files will be down the right side. The main ones you want to check are header.php, sidebar.php, footer.php and index.php, but you will want to check every single file listed for anything suspicious.
If you don’t want to look through every file yourself, you can also use the file scanner in the above mentioned Wordfence plugin to scan your site and find anything suspicious.
So what is suspicious code? Look for anything that looks like a bunch of garbled text/code, or maybe a bunch of links to spammy-looking sites. Specifically look for anything that uses the eval() command, base64_decode(), k1b0rg or keymachine.de and delete these lines of code. (It’s a good idea to back up your theme files before doing this in case you accidentally remove something important.)
UPGRADE/REPLACE YOUR WORDPRESS FILES
If you don’t have the most recent version of WordPress, upgrade immediately. Even if you are current, you should replace all your files with a fresh install in case the hacker modified any of the files or added any new files to your WP folders. This means completely removing your wp-admin and wp-includes folders and all of the wp-something.php files that are in the main WP directory. DO NOT remove wp-config.php or the wp-content folder. Everything else is replaceable, though.
CHECK FOR SUSPICIOUS FILES IN (AND AROUND) YOUR WORDPRESS DIRECTORY
You can access this via FTP or through your control panel file manager. Since you didn’t delete your wp-content folder, you will need to check this for suspicious files as well. The main place to look will be your uploads folder, where the pictures you upload to your blog are stored. For most WP blogs this is in wp-content>uploads. Look through all the files and make sure they are the right file extensions. Picture file extensions are .jpg, .gif, .png and bmp. Delete anything that isn’t one of these extensions unless you uploaded it yourself. Nothing with a .php file extension should be in your uploads folder. Those kinds of files are most certainly bad. Besides looking for weird file extensions, look for files that have strange/random names that you know you did not upload.
After checking your uploads folder go through and also check your plugins and themes folders for the same kind of files. Make sure to check the images folder in your themes. You may want to reinstall all your plugins as well to make sure none of them had been modified either.
Checking all these things may sound tedious, but if you know the exact day the hack happened, you can look for things that were added/modified on that day.
If this all sounds like Chinese to you (What’s a FTP?) I recommend contacting your web host. They should be able to scan your site and get rid of the infected files for you.
NOTIFY GOOGLE THAT YOUR SITE IS SAFE
Now that you’ve gotten everything removed and your site is safe again, how do you get google to remove that warning? When I visited my client’s hacked site in Firefox, it wouldn’t let me view it. It gave me a big red screen saying the site was dangerous. Unfortunately, this doesn’t automatically go away once you remove the malicious files. You need to notify google to re-scan your site and verify that it is safe again. You can do this by putting in your URL here: https://safebrowsing.google.com/safebrowsing/report_error/?hl=en
You can also request a review using Google Search Console (previously called Google Webmaster Tools). You have to register and verify your site first, so it’s a little more involved, but I you’ll get faster results if you go through the effort. Here’s some more info about that straight from Google.
In my next post I will talk about some of the things you can do to keep your site secure and prevent it from being hacked.
Jerry says:
This is a great resource for anyone who has a site that has been under attack from hackers. There is nothing more of a pain then getting your site hacked and having to fix it.